Have you been hearing about teachers switching out their word walls with sound walls? Are you wondering if this is something you should do in your classroom? If so, keep reading because I’m sharing tips on how to use a sound wall in the classroom to enhance your phonics instruction.
What is a Sound Wall?
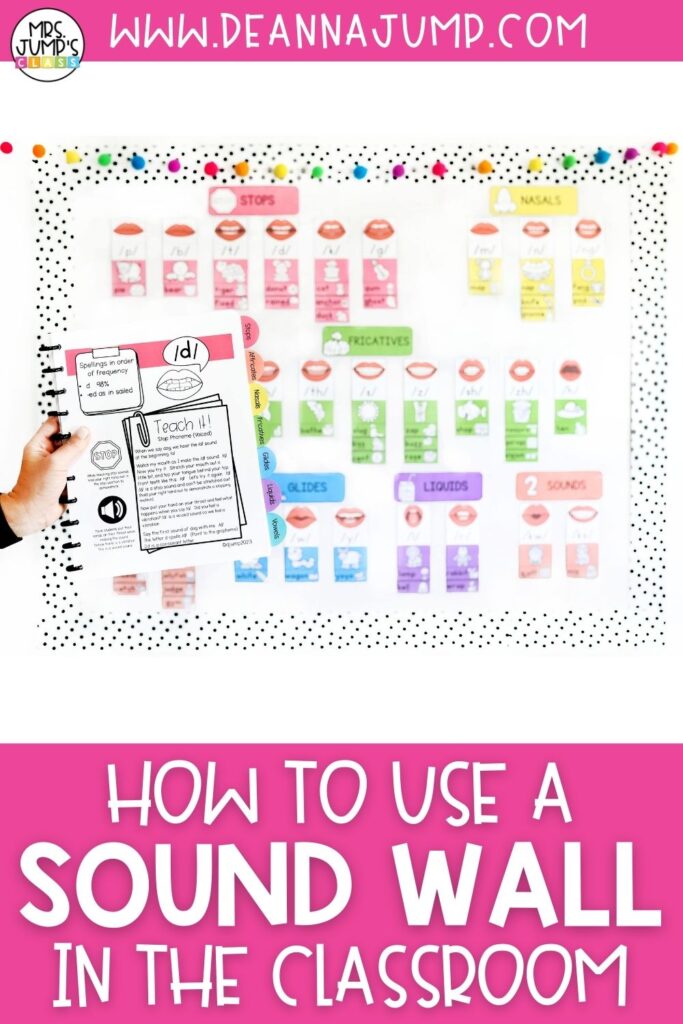
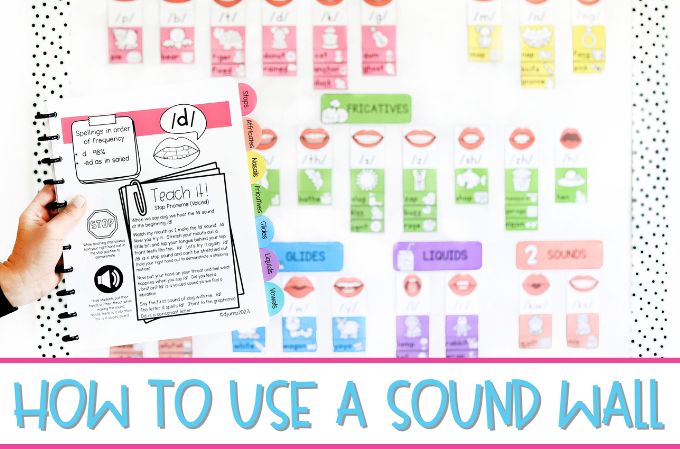
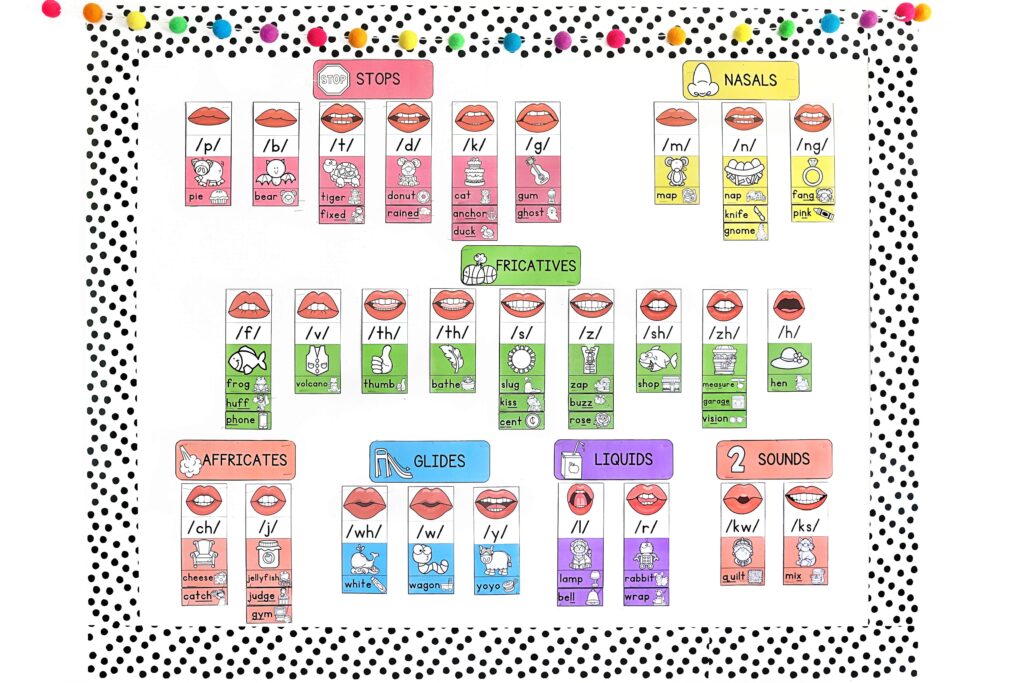
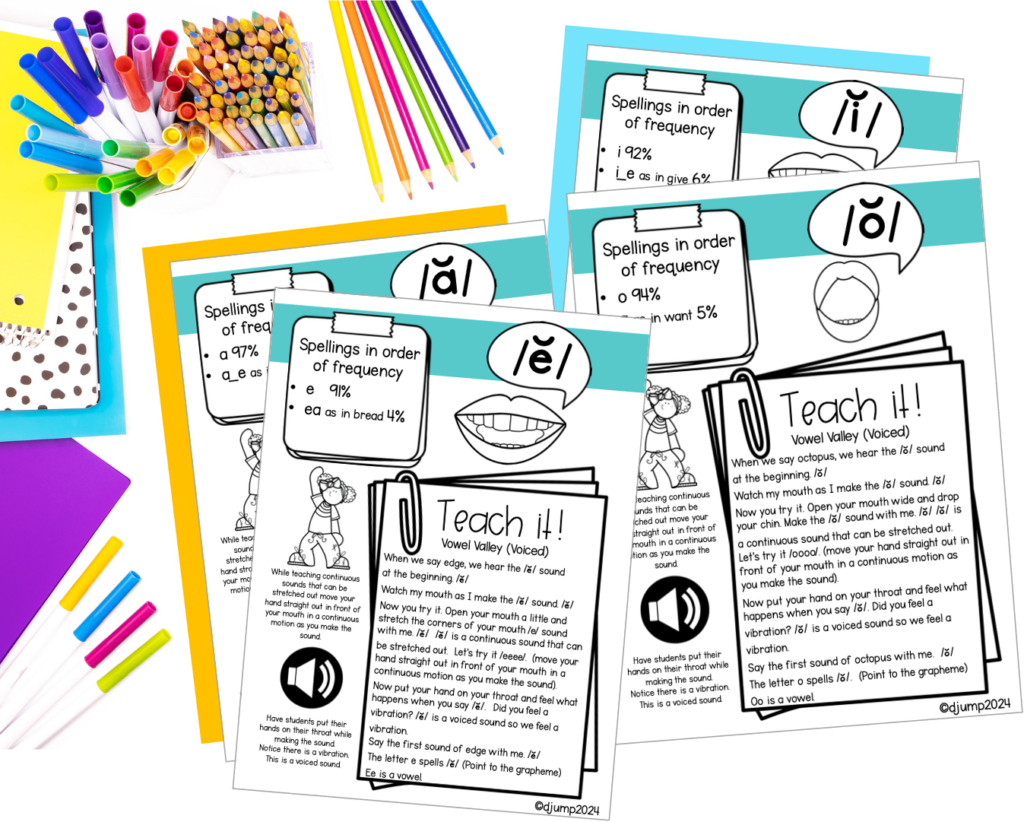
A sound wall is used to display the 44 phonemes (speech sounds) of spoken English. Since each phoneme can be spelled in different ways, a sound wall keeps those spelling patterns organized by phoneme on the sound wall. Students can then reference the sound wall to help them with tasks like spelling throughout the school day.

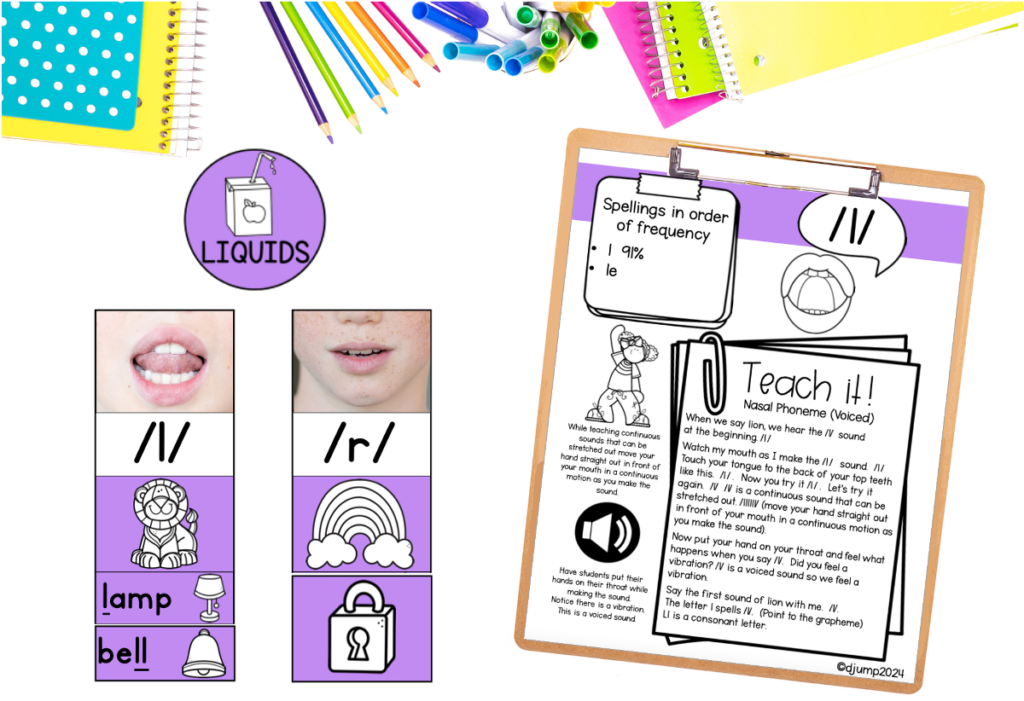
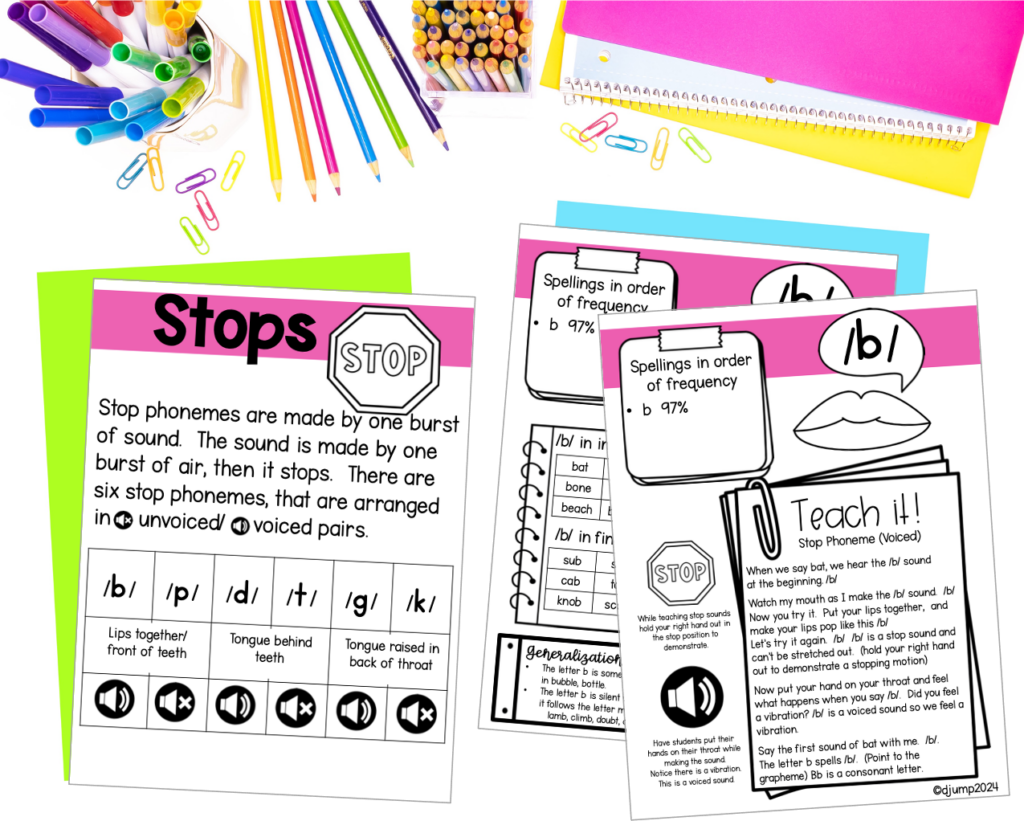
Sound walls are generally displayed in two parts, with consonant sounds on one part and vowel sounds on the other. The phonemes are also grouped based on how the sounds are created with the mouth and voice.
Sound Wall vs. Word Wall
A sound wall is not the same thing as a word wall. While there might be words listed on a sound wall to model the different spelling patterns (graphemes), those words are grouped differently than word walls.
Traditional word walls list words in alphabetical order, regardless of the sounds used in the word. On a traditional word wall, you would find the words “kick” and “knife” under the letter “K”. On a sound wall, “kick” would be found under the /k/ phoneme, and “knife” would be listed under the /n/ phoneme.
Why is this difference important?
A traditional word wall is only as helpful as the alphabetic knowledge that a student has available to them. It would be like going to a library where they have grouped the books by the birthplace of the author. You would be lacking a lot of the background knowledge necessary for that organization system to be useful for you!
Students have a lot more clues that they can use to help them find what they need on a sound wall compared to a word wall.
How to Use a Sound Wall in the Classroom
1. Introduce the Sound Wall
The first step is to introduce the sound wall to your students. You can explain the purpose of the sound wall, what the labels and pictures mean, and model how they can find what they’re looking for. It’s helpful to use phonemes that students already know to help you introduce the sound wall to your students.
2. Add Sounds One at a Time
Once you’ve had a chance to discuss the purpose of the sound wall, it’s time to start building this helpful resource! Rather than add all of the phonemes to the wall at the very beginning, it’s more beneficial to add them one at a time. You can add each sound as it comes up in your literacy curriculum.
Don’t worry, you don’t have to keep a disassembled sound wall on hand all year! You can still build your sound wall on the bulletin board in advance. Just turn over the phoneme cards or cover them with a “lock” until your students are ready for them.
3. Explore New Sounds
When adding a new phoneme to the sound wall, take plenty of time to explore this new sound with your students. As they make the sound, discuss what their lips, teeth, and tongue are doing. They can explore voiced and voiceless sounds by placing a hand on their throat as they make the sound. It’s helpful to have students look in a mirror to watch what their mouth is doing as they make the sound.
All of this exploration will make it more likely that your students will use the sound wall when they need it!
4. Build as You Go
As you add different phonemes to the wall, you don’t need to have all of the different graphemes represented right away. You can add those sound spellings as you introduce them in your literacy curriculum. This will keep your students from becoming overwhelmed!
5. Regularly Review the Sound Wall
A sound wall is not a “set it and forget it” resource! Be sure to regularly review the sound wall with your students. Did you come across a tricky word during a writing mini-lesson? Refer to your sound wall to model how to find the grapheme you need to spell that word.
You could also do short activities like a sound hunt to give students a chance to review where to find what they need on the sound wall. For example, you could say a phoneme and have students take turns using a pointer to find it on the sound wall.
6. Encourage Students to Reference the Sound Wall
The more you review the sound wall together as a class, the more likely your students will be to use it independently. This is the goal! You can encourage students to reference the sound wall when they’re having trouble spelling a word during writer’s workshop or another independent work time. You can repeat the sound with them and encourage them to think about the mouth position if they seem to be having trouble locating the sound spelling they need.
Over time, your sound wall will be a powerful tool that you can use to support explicit phonics instruction in your classroom.
Printable Sound Wall Display
Would you like to use a sound wall to enhance phonics instruction in your classroom? I have put together a helpful Science of Reading Sound Wall resource with everything you need! You’ll find all of the sound wall pieces that you need to assemble your display. This resource also includes a teacher’s guide with teaching tips, spelling examples, and letter formation guides.
This sound wall is rooted in the latest Science of Reading research that links phonemic awareness skills to grapheme knowledge.
If you’d like to take a closer look at everything included in this resource, just head over to my TPT store to check it out!
Save These Tips for Sound Walls in the Classroom
Be sure to save this post so you can come back to it later! Just add the pin below to your favorite teaching board on Pinterest. You’ll be able to quickly find these tips and resources when you’re ready to use a sound wall in your classroom.